
Have you ever watched someone effortlessly create gorgeous, bouncy curls and thought, “I wish I could do that”? Well, you absolutely can! Transforming your straight locks into voluminous curls or creating those perfect beach waves isn’t as complicated as it seems. With the right tool, proper technique, and a few safety precautions, you’ll be styling like a pro in no time.
I remember my first time using a curling iron – a mixture of excitement and terror as I held this hot metal cylinder near my precious hair. Would I burn myself? Would I fry my hair? Would I end up looking like I stuck my finger in an electrical socket? If you’re feeling the same way, don’t worry – we’ve all been there.
This guide will walk you through everything you need to know about safely using a curling iron, from selecting the right tool for your hair type to creating different styles and avoiding common mistakes. By the end, you’ll have the confidence to create salon-worthy curls in the comfort of your own home.
Table of Contents
Choosing the Right Curling Iron for Beginners
Before you even plug in a curling iron, you need to make sure you have the right one for your needs. With so many options available, it can feel overwhelming, but I’ll break it down to make your decision easier.
Understanding Different Materials: Ceramic, Tourmaline, and Titanium
The material of your curling iron’s barrel plays a huge role in how it styles your hair and whether it causes damage.
Ceramic curling irons are ideal for beginners. They heat evenly, reducing hot spots that could damage your hair. The smooth surface allows hair to glide easily, minimizing the risk of snags and breakage. If you’re just starting out, this should be your go-to choice.
I’ve found that ceramic irons are particularly forgiving if you accidentally leave a section wrapped for too long – they’re less likely to singe your hair than other materials.
Tourmaline curling irons have ceramic barrels infused with tourmaline, a mineral that emits negative ions when heated. These ions help seal the hair cuticle, reducing frizz and increasing shine. They’re great for people with frizzy or damaged hair who want smoother, shinier curls.
Titanium curling irons heat up quickly and maintain high temperatures consistently. They’re lightweight and durable but can be too harsh for beginners or those with fine, damaged hair. I’d recommend saving these for when you’ve mastered the basics and understand your hair’s heat tolerance.
Barrel Size: Finding the Right Fit for Your Hair
Choosing the right barrel size depends on your hair length and the type of curls you want to create:
- 3/8 to 1/2 inch: Creates tight, springy curls; ideal for short hair or detailed curls
- 3/4 to 1 inch: The most versatile size for medium to long hair; creates classic curls
- 1 1/4 to 1 1/2 inch: Perfect for loose waves and volume in longer hair
- 2 inch and larger: Creates very loose waves or simply adds body and movement
For most beginners, a 1-inch barrel provides the most flexibility. You can create tighter curls by using smaller sections of hair or looser waves by using larger sections.
Features That Make Curling Easier for Beginners
When shopping for your first curling iron, look for these beginner-friendly features:
- Adjustable heat settings so you can start low and find what works for your hair
- Digital temperature display to give you precise control
- Auto shut-off for safety (we’ve all had that “Did I turn off my curling iron?” panic)
- Cool tip to give you a safe place to hold the barrel while styling
- Swivel cord to prevent tangling as you move around your head
- Heat-resistant glove (either included or purchased separately) to protect your hands
Top Recommended Curling Irons for Beginners
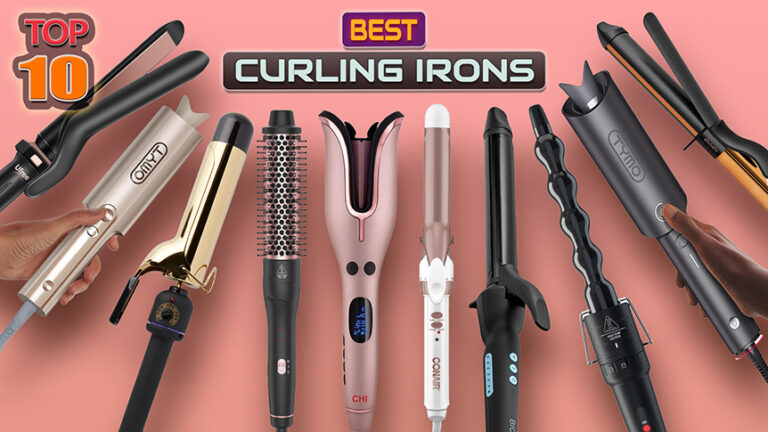
Based on extensive research and personal experience, here are some excellent options for those just starting their curling journey:

- Conair Double Ceramic Curling Iron: An affordable option with multiple heat settings that heats up quickly. The ceramic coating provides even heat distribution, making it forgiving for beginners.
- Hot Tools Curling Iron for Beginners: Specifically designed with newcomers in mind, this iron offers easy-to-use features and reliable results at a reasonable price point.
- TYMO Automatic Rotating Curling Iron: Perfect for those who struggle with coordination, this iron does the work for you by automatically rotating to curl your hair. Its anti-tangle technology is a lifesaver for beginners.
- ANIEKIN 5 in 1 Curling Iron Set: If you’re unsure which barrel size will work best, this interchangeable set lets you experiment with different options without buying multiple tools.
- CHI Spin N Curl: For those who want foolproof curls with minimal effort, this innovative tool draws hair into a chamber where it’s heated and timed, creating consistent curls every time.
Remember, you don’t need to spend a fortune on your first curling iron. Many affordable options work wonderfully while you’re learning. You can always upgrade once you’ve mastered the basics and know exactly what features matter most to you.
Essential Safety Precautions Before You Start
Safety should always be your priority when using hot styling tools. A moment of carelessness can lead to burned fingers, damaged hair, or even household accidents. Let’s cover the essential precautions before you plug in that iron.
Heat Protectant: Your Hair’s Best Defense
I cannot stress this enough: always use a heat protectant before applying any hot tool to your hair. Think of it as sunscreen for your strands – an essential layer of protection, not an optional extra.
Heat protectants work by creating a barrier between your hair and the hot barrel, helping to:
- Seal in moisture
- Minimize protein loss
- Reduce breakage and split ends
- Prevent color fading
Apply heat protectant to dry hair, spraying or applying the product evenly from mid-shaft to ends. Make sure your hair is completely dry before using a curling iron – wet or damp hair will sizzle and can be severely damaged by direct heat.
My personal routine includes combing through my hair after applying heat protectant to ensure even distribution. It only takes an extra minute but makes a world of difference for hair health.
Setting Up a Safe Styling Station
Before you begin, create a safe environment for styling:
- Use a heat-resistant surface like a silicone mat to place your hot iron on when not in use
- Keep flammable items (hairspray, tissues, makeup) away from your hot tools
- Style in a well-lit area so you can see what you’re doing
- Have a mirror positioned so you can see the back of your head
- Keep a glass of water nearby (not to drink – in case of minor burns)
- Make sure your iron is on a stable surface when heating up
- Position yourself near an outlet to avoid stretching cords across walkways
Understanding Temperature Settings
One of the biggest mistakes beginners make is cranking the heat to maximum. More heat doesn’t equal better curls – it equals damaged hair.
Here’s a general guide for temperature settings based on hair type:
| Hair Type | Recommended Temperature | Why This Works |
|---|---|---|
| Fine or damaged | 250-300°F (120-150°C) | Lower heat prevents further damage to delicate strands |
| Normal or medium | 300-350°F (150-175°C) | Moderate heat creates lasting curls without damage |
| Thick or coarse | 350-400°F (175-205°C) | Higher heat penetrates thicker hair effectively |
| Very coarse or resistant | 400-430°F (205-220°C) | Maximum heat for hard-to-curl hair types |
Start with the lowest recommended temperature for your hair type and adjust only if necessary. If you’re getting good curls that last, there’s no need to increase the heat.
I always recommend doing a test curl at a lower temperature first. If it falls out within minutes, you can gradually increase the heat. But if it holds well, stick with the lower setting to minimize damage.
Pre-Styling Hair Preparation
Proper preparation makes all the difference in how your curls turn out and how long they last:
- Start with clean, dry hair. Day-old hair often holds curls better due to reduced oil.
- Brush thoroughly to remove all tangles before you begin.
- Apply heat protectant and let it dry completely.
- Section your hair using clips to keep it organized and manageable.
- If desired, apply a light styling product like mousse or curl-enhancing cream for additional hold.
Taking these steps before you even turn on your curling iron sets you up for success and helps protect your hair from unnecessary damage.
Read more on: Top 10 Best Hair Dryers Reviewed: Find Your Perfect Match in 2025.
Step-by-Step Guide to Using a Curling Iron
Now for the main event – actually using your curling iron! I’ll break this down into clear, easy-to-follow steps that will have you curling like a pro in no time.
Preparation Steps
- Plug in your curling iron and set it to the appropriate temperature for your hair type.
- Section your hair while the iron heats up. For beginners, I recommend creating four main sections: left side, right side, back bottom, and back top. Clip the sections you’re not working on out of the way.
- Put on your heat-resistant glove on the hand you’ll use to wrap hair around the barrel.
- Do a quick test on a small, inconspicuous piece of hair to ensure the temperature works for you.
Proper Sectioning Techniques
Working with manageable sections is key to creating even, long-lasting curls:
- Start with 1-inch sections for your first attempts. You can experiment with different section sizes later.
- Take sections that are no wider than the barrel of your curling iron.
- Keep sections about 1/2 inch thick for more defined curls, or up to 1 inch thick for looser waves.
- Always comb through each section before curling to remove any tangles.
I find it helpful to work from the bottom up – start with the underneath layers and work your way to the top sections that are most visible.
Correct Holding and Wrapping Techniques
For traditional clamp curling irons:
- Hold the iron horizontally with the handle slightly lower than the barrel.
- Open the clamp and insert the hair section near the roots (but not too close to the scalp).
- Close the clamp and rotate the iron away from your face.
- Slowly glide the iron down to the ends of your hair.
- Hold for 5-10 seconds, then release the clamp and carefully pull the iron away.
For wand curling irons:
- Hold the wand with the tip pointing downward.
- Wrap a section of hair around the barrel, starting near the roots and working down (keep your heat-resistant glove on!).
- Wrap away from your face for a more natural look.
- Hold for 5-10 seconds, then carefully release.

A pro tip I’ve learned: don’t pull on the hair while it’s wrapped around the barrel. Letting it heat without tension creates bouncier, longer-lasting curls.
Timing for Different Curl Types
The amount of time you leave your hair wrapped around the barrel affects the intensity of your curls:
- For loose waves: 3-5 seconds
- For medium curls: 5-8 seconds
- For tight curls: 8-12 seconds
Remember that these times are just starting points – your specific hair type might need more or less time. Fine hair typically needs less time, while thick or coarse hair may need more.
Important safety note: Never leave any section of hair on the curling iron for more than 10-12 seconds, regardless of your hair type. Prolonged exposure to high heat can cause severe damage.
Cooling and Setting the Curls
How you handle your curls immediately after releasing them from the iron makes a huge difference in how they look and how long they last:
- When you release a curl from the iron, carefully catch it in your palm (with the heat-resistant glove) and hold it in a coil shape while it cools for a few seconds.
- Gently release it or secure it with a clip to cool completely in the curled position.
- Resist the urge to run your fingers through your curls or brush them out until all sections are curled and fully cooled.
- Once all curls are complete and cooled, you can gently shake them out or lightly separate them with your fingers.
- Finish with a light mist of flexible-hold hairspray if desired.
The cooling phase is when the curl actually sets, so don’t rush this step. Allowing your curls to cool completely in their wrapped position can double the longevity of your style.
Creating Different Curl Styles
One of the best things about mastering the curling iron is the variety of styles you can create with just one tool. Let’s explore some popular techniques.
Loose Waves Technique
For those effortless, beachy waves that look like you just stepped off the shore:
- Use a larger barrel (1-1.5 inches) and take larger sections of hair (about 1-1.5 inches wide).
- Wrap the hair around the barrel, leaving the ends out for a more casual look.
- Hold for just 3-5 seconds.
- After all sections are curled and cooled, gently tousle with your fingers and apply a texturizing spray.
- For extra beach-wave authenticity, try braiding your hair while it’s damp, then using the curling iron on the braided sections after they’ve dried.
This technique creates movement and body without the formal look of defined curls – perfect for everyday wear.
Tight Curls Technique
For bouncy, springy curls that make a statement:
- Choose a smaller barrel (3/4 inch or smaller) and work with smaller sections of hair (about 1/2 inch).
- Wrap each section tightly around the barrel, making sure to include the ends.
- Hold for 8-10 seconds.
- After releasing from the iron, immediately pin each curl to your head with a bobby pin or small clip and let it cool completely before removing.
- Once cooled and released, avoid brushing through these curls – just separate gently with your fingers.
I find that a bit of lightweight curl-defining cream applied before curling helps tight curls stay bouncy without becoming frizzy.
Beach Waves Approach
The ever-popular beach waves combine the best of both worlds – definition with effortless movement:
- Use a 1-inch barrel and alternate your technique as you move around your head.
- For some sections, wrap the hair flat around the barrel (like ribbon around a present).
- For other sections, twist the hair first, then wrap the twisted section around the barrel.
- Vary the direction – curl some pieces toward your face and others away.
- Leave the ends out on some sections for a more undone look.
- After cooling, apply a salt spray and scrunch gently for added texture.
The key to authentic beach waves is inconsistency – you want each section to look slightly different for that natural, windswept effect.
Tips for Short vs. Long Hair
For short hair:
- Use a smaller barrel (3/8 to 3/4 inch) to create curls that don’t overwhelm your hair length
- Take smaller sections to ensure the curl forms properly
- Consider a curling wand rather than a clamp iron to avoid creases in short layers
- Use lower heat to prevent damaging shorter strands that have less length to distribute heat
- Try the “ribbon curl” technique where you wrap hair around the barrel like a ribbon for more natural movement
For long hair:
- Use a curling iron with a longer barrel to accommodate your hair length
- Section hair more thoroughly to ensure even heat distribution
- Consider starting the curl a few inches from your roots to avoid too much volume at the top
- Alternate between curling toward and away from your face for a more natural look
- Pin curls up as they cool to prevent them from stretching out due to their weight
I’ve found that people with long hair often benefit from using two different barrel sizes – a larger one for the layers near the face for a softer frame, and a medium one for the back to add body and movement.
Common Mistakes Beginners Make and How to Avoid Them
We all make mistakes when learning a new skill, but some curling iron errors can lead to damaged hair or disappointing results. Let’s address the most common pitfalls and how to avoid them.
Temperature Mistakes
Mistake: Using too much heat Solution: Always start with the lowest effective temperature for your hair type and increase only if necessary. Remember that heat damage is cumulative and often irreversible.
Mistake: Not checking the actual temperature Solution: Some curling irons run hotter than their settings indicate. Do a quick test curl and if your hair sizzles or smells burnt, immediately reduce the heat.
Mistake: Using the same temperature for all hair sections Solution: The hair at the crown of your head is often more fragile than the rest. Consider using a slightly lower temperature for these areas.
I once had a client who couldn’t figure out why her hair kept breaking despite using what she thought was a reasonable temperature. When we tested her curling iron with a thermometer, it was running 50°F hotter than the display showed! Always trust what your hair is telling you over what the device says.
Sectioning Errors
Mistake: Taking sections that are too large Solution: Smaller sections heat more evenly and create more defined curls. If you’re struggling, it’s almost always better to work with smaller sections.
Mistake: Inconsistent section sizes Solution: Try to maintain similar section sizes throughout your head for a more uniform look. Using clips to precisely section before you begin helps tremendously.
Mistake: Not combing through sections before curling Solution: Always comb or brush each section immediately before curling to remove tangles that could catch on the barrel.
Timing Issues
Mistake: Holding the iron on hair for too long Solution: Set a mental count or use the timer function if your iron has one. Hair should never be on the iron for more than 10-12 seconds maximum.
Mistake: Not holding long enough for your hair type Solution: If your curls fall out immediately, you may need to hold a few seconds longer (while staying within safe limits) or increase the temperature slightly.
Mistake: Rushing the cooling process Solution: Allow curls to cool completely in their coiled shape before touching or brushing them. This could take 30 seconds to a minute per curl.
Product Missteps
Mistake: Skipping heat protectant Solution: Never negotiate on this – heat protectant is essential every single time you use hot tools.
Mistake: Using too much product before curling Solution: Heavy products can weigh down curls or cause them to “fry” on the iron. Use lightweight products applied primarily to mid-lengths and ends.
Mistake: Applying hairspray before curling Solution: Hairspray should typically be applied after curling, not before. Applying hairspray before can cause hair to stick to the iron or even sizzle when heated.
A technique I recommend to my clients who struggle with falling curls is to spray a light mist of hairspray on each section after combing it and allow it to dry for a few seconds before curling. This provides extra hold without the dangers of applying hairspray to hair that’s already on the iron.
Maintaining Your Curling Iron
A well-maintained curling iron performs better and lasts longer. Plus, a clean iron is less likely to snag or damage your hair.
Cleaning Procedures
Your curling iron needs regular cleaning to remove product buildup and residue:
- Always clean when the iron is unplugged and completely cool.
- For light cleaning: Wipe the barrel with a damp cloth or alcohol wipe.
- For stubborn residue: Apply rubbing alcohol to a cloth (not directly to the iron) and gently rub the barrel.
- For baked-on product: Make a paste with baking soda and water, apply to cool barrel, let sit for a few minutes, then wipe clean.
- Never submerge your curling iron in water or any liquid.
- Avoid abrasive cleaners that could scratch ceramic or tourmaline coatings.
I recommend quick-cleaning your curling iron after every 3-4 uses, with a deeper clean once a month for regular users.
Storage Best Practices
Proper storage prevents damage and extends the life of your investment:
- Allow your curling iron to cool completely before storing.
- Loosely wrap the cord using the manufacturer’s cord wrap or a velcro tie.
- Avoid tight wrapping that can damage internal wiring.
- Store in a heat-resistant pouch or holder if available.
- Keep in a dry place away from water sources.
- Consider hanging storage options to prevent barrel damage.
If your curling iron came with a heat-resistant mat or tip, always use these when setting down the hot iron during styling and make sure they’re clean and intact before storage.
When to Replace Your Curling Iron
Even the best curling irons don’t last forever. Here are signs it’s time for a replacement:
- Inconsistent heating: Hot spots or failure to maintain temperature
- Damaged coating: Chips, scratches, or peeling on the barrel surface
- Loose parts: Wobbly barrel or insecure clamp
- Frayed cord: Any visible wire or damage to the cord covering
- Intermittent power: Cutting on and off during use
- Unusual odors: Burning smell when plugged in (unplug immediately)
- Excessive age: Most curling irons should be replaced every 2-4 years with regular use
I’ve found that many people wait too long to replace damaged styling tools. Remember that a compromised curling iron isn’t just less effective – it can be dangerous to both your hair and your home.
Advanced Tips for When You’re Ready
Once you’ve mastered the basics, these advanced techniques can take your curling game to the next level.
Combining Techniques
Creating dimension and natural-looking curls often requires mixing techniques:
- Alternate barrel sizes on different layers of hair
- Curl some sections away from the face and others toward it
- Combine traditional wrapping with the ribbon-wrapping method
- Create “stacked curls” by curling two directions on the same piece of hair
- Use flat iron curls for the bottom layers and curling iron curls for top layers
My favorite combination for a natural look is using a larger barrel on the front sections wrapped away from the face, medium barrel for mid-head sections in alternating directions, and smaller barrel for a few accent pieces throughout.
Working with Difficult Hair Types
Every hair type presents unique challenges when curling:
For very fine hair:
- Use the lowest effective heat setting
- Apply a volumizing mousse before drying
- Consider a smaller barrel to create more definition
- Try overnight heatless curling methods to supplement hot tool styling
For very thick hair:
- Take your time with smaller sections
- Prepare with a blow-dry using a round brush first
- Consider a titanium barrel for more effective heat transfer
- Use stronger hold products applied to damp hair before drying
For very straight, resistant hair:
- Create a foundation with a rougher blow-dry technique
- Apply a setting spray before curling each section
- Hold each curl with a clip until completely cool
- Consider a perm solution (very diluted) as a prep spray (consult a professional first)
For already curly hair:
- Use curling irons to refine and define natural curl patterns
- Focus on the crown and front sections where definition matters most
- Choose a barrel size similar to your natural curl diameter
- Consider flat-wrapping techniques rather than traditional curling
Quick Styling for Busy Mornings
When time is tight but you still want great curls:
- Focus on what shows: Curl only the top layer and pieces around your face
- Larger sections: Use bigger sections with a larger barrel for quick waves
- The twist-and-curl technique: Twist sections of hair, then wrap the twisted section around the barrel for faster, textured curls
- Prep the night before: Sleep in loose braids or buns, then use the curling iron just to touch up in the morning
- The half-up cheat: Curl just enough to pull your hair into a half-up style that showcases the curled portions
My personal time-saving trick is sectioning my dry hair into four twisted buns before bed. In the morning, I release them and use a curling iron just on the pieces that need definition. This cuts my styling time in half!
Read more on: Top 10 Best Curling Irons in 2025: Reviews & Buying Guide.
Frequently Asked Questions:
1. What temperature should I set my curling iron to for fine hair?
For fine or damaged hair, always start with a low temperature between 250-300°F (120-150°C). Fine hair requires less heat to curl and is more susceptible to damage. Start at the lowest setting and only increase if your curls aren’t holding.
2. How do I keep my curls lasting all day?
To maximize curl longevity: 1) Let each curl cool completely before touching it, 2) Use a lightweight hairspray on each section before curling, 3) Pin curls while cooling, 4) Use the right heat setting for your hair type, and 5) Apply a finishing spray designed for hold without heaviness.
3. Is it better to curl clean or day-old hair?
Day-old hair typically holds curls better because natural oils provide some grip and texture. If you’re working with freshly washed hair, consider using a texturizing spray or light mousse before styling to help curls last longer.
4. How often can I use a curling iron without damaging my hair?
For most hair types, limiting heat styling to 2-3 times per week is ideal. If you need to curl your hair more frequently, focus on using lower heat settings, always apply heat protectant, and incorporate weekly deep conditioning treatments into your routine.
5. Why does my hair smell burnt when I use a curling iron?
A burning smell indicates your temperature is too high or you’re holding the iron on your hair for too long. It could also mean product buildup on your iron is burning. Lower your heat setting, clean your curling iron, and always use heat protectant before styling.
6. Can I use a curling iron on wet or damp hair?
No, never use a curling iron on wet or damp hair. The water inside the hair shaft can boil, creating bubbles inside the hair that cause breakage and severe damage. Always ensure your hair is completely dry before using any hot styling tool.
7. What’s the difference between a curling iron and a curling wand?
The main difference is the clamp. A curling iron has a clamp to hold hair in place, while a curling wand doesn’t, requiring you to hold the hair around the barrel manually. Wands typically create more natural-looking curls without crease marks, while irons can be easier for beginners to control.
8. How do I curl my hair without creating creases from the clamp?
To avoid clamp marks: 1) Don’t place the clamp at the very ends of your hair, 2) Keep the clamp slightly relaxed rather than tightly squeezed, 3) Don’t hold the section with tension while curling, or 4) Consider using your curling iron as a wand by not using the clamp at all.
9. How do I curl short hair that’s barely long enough to wrap?
For very short hair, use a small barrel (3/8″ or 1/2″), work with tiny sections, and use the clamp to hold the ends while rotating the iron. Alternative methods include using flat iron curling techniques or hot rollers for shorter styles.
10. Why do my curls fall out within an hour?
Curls may fall quickly if: 1) Your iron isn’t hot enough for your hair type, 2) You’re not allowing curls to cool completely before brushing out, 3) You’re using heavy products that weigh hair down, 4) Your hair is resistant to styling, or 5) There’s high humidity in your environment.
11. Is a titanium or ceramic curling iron better for beginners?
Ceramic curling irons are generally better for beginners because they distribute heat more evenly and are more forgiving with temperature control. Titanium heats extremely quickly and can easily damage hair if you’re still learning proper technique and timing.
12. How do I clean product buildup off my curling iron?
To clean buildup: 1) Ensure the iron is unplugged and completely cool, 2) Wipe with a cloth dampened with rubbing alcohol, 3) For stubborn residue, make a paste with baking soda and water, apply to the cool barrel, let sit for a few minutes, then wipe clean, 4) Never submerge your curling iron in water.
13. Can I use regular hairspray before curling my hair?
It’s generally not recommended to apply hairspray directly before curling, as the alcohol in the spray can “fry” when heated and damage your hair. Instead, use heat-specific styling products before curling and save hairspray for setting your finished style.
14. What’s the best way to curl hair for beginners with no experience?
Start with a 1-inch barrel ceramic curling iron with adjustable heat settings. Practice on lower heat with small sections of hair, curling away from your face. Consider watching video tutorials and practicing when you don’t need to go out, so there’s no pressure to achieve perfect results immediately.
15. Do I need different barrel sizes for different curl types?
While not absolutely necessary for beginners, different barrel sizes create different curl effects: smaller barrels (3/4″ or less) create tight curls, medium barrels (1″) create classic curls, and larger barrels (1 1/4″ or greater) create loose waves. If you’re just starting out, a 1-inch barrel provides the most versatility.
Conclusion
Learning to use a curling iron safely and effectively is truly a game-changer for your hair styling routine. From casual waves for everyday wear to polished curls for special occasions, mastering this tool gives you versatility and confidence in your personal style.
Remember these key takeaways:
- Safety first: Always use heat protectant and appropriate temperature settings.
- The right tool matters: Choose a curling iron that suits your hair type and desired styles.
- Technique takes practice: Don’t be discouraged if your first attempts aren’t perfect.
- Maintenance matters: Keep your curling iron clean and replace it when necessary.
- Have fun experimenting: Try different techniques to discover what works best for your unique hair.
I hope this guide has helped demystify the curling iron and given you the confidence to create beautiful, damage-free curls. Your journey to gorgeous hair is just beginning!
Ready to put your new skills to the test? Start with a simple style like loose waves, and as your confidence grows, experiment with different techniques and looks. Before you know it, you’ll be the friend everyone asks for hair styling advice!
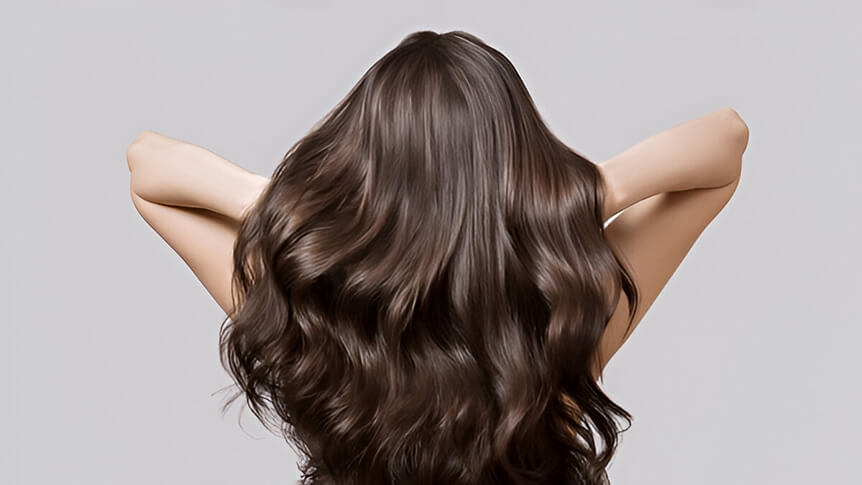

What curl style will you try first?
Click the links below to check current prices and bring home your perfect curling iron today!
Share your creations or questions in the comments below – I’d love to hear about your curling iron journey!
Disclaimer: This article might contain affiliate links, meaning we may earn a commission if you click through and make a purchase at no extra cost to you.








2 thoughts on “The Ultimate Beginner’s Guide to Using a Curling Iron Safely”